How to Make Transparent PNGs for Virtual Try-On (Earrings & Tiny Jewelry)
Adding a try-on button to a product page takes a few minutes. Preparing the product images does not. Every try-on system — ours included — needs one PNG with a transparent background per product, and that step is yours.
Get it wrong and the shopper sees a white rectangle glued to their ear. That’s worse than no try-on at all. This guide is the exact process we use for our own jewelry store (Adelina Style), where we’ve processed several hundred earring SKUs.
Why it has to be a transparent PNG
Try-on detects the ear position on the camera feed and draws the product image on top of it. Whatever is in the image gets drawn — including the background.
- JPEG has no concept of transparency → unusable
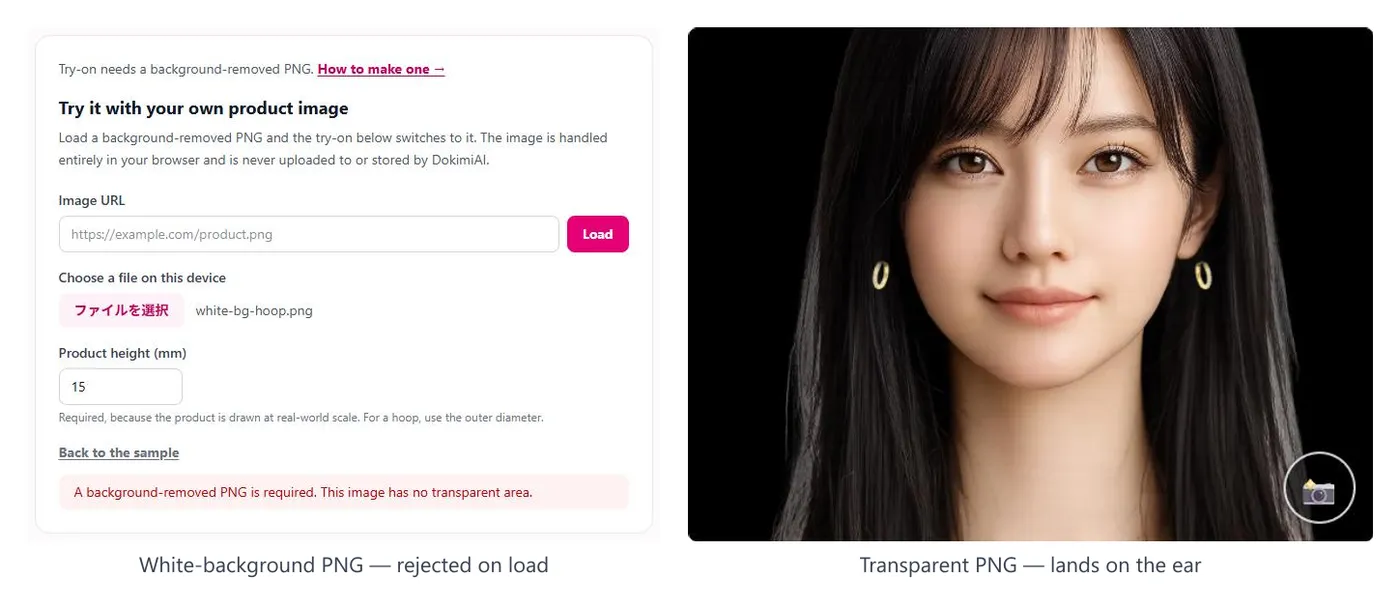
- PNG with a white background → a white panel on the ear
- PNG with an alpha channel → only the product appears
Note: the check page at dokimiai.io/en/try/ rejects a PNG with no transparent pixels at load time. Try-on installed on your store does not inspect the file, so the white panel appears as-is.
So “PNG” alone isn’t the requirement. The requirement is a PNG with actual transparent pixels.
Three steps
Step 1: Shoot it right (this decides 80% of the result)
Background-removal tools are only as good as the source photo, and tiny products are unforgiving.
- Plain white or very light grey background. Patterns, shadows, and reflections don’t cut cleanly
- Straight on, filling the frame. The smaller the product in the photo, the worse the edge accuracy
- Hide the post. A stud’s post is invisible once it’s worn. If it shows in the try-on image, the earring looks like it’s floating next to the ear rather than through it. Shoot with the post facing away, or from an angle where only the decorative part is visible
- Diffuse the light. Hard reflections on metal blend into a white background, and the removal tool deletes that part of the product as “background”
Reshooting is far cheaper than any later fix. Keep that in mind from the start.
Step 2: Remove the background
A free machine-learning model (rembg or similar) is enough. We use the isnet-general-use model. Browser-based removal services also work.
Always zoom to at least 100% and check these spots:
- Inside a hoop — background tends to survive inside the ring
- Thin chains and fine lines — they break or disappear
- Reflective metal — blends into white and gets removed with the background
If a white fringe remains around the edge, reshooting beats fiddling with edge settings.
Save as PNG with the alpha channel intact. Check that the export isn’t set to “fill background with white.”
Step 3: Check it in the try-on view
Load the saved PNG into the actual try-on view and look at it on an ear. Something that looks clean on a desktop screen can show jagged edges once it’s placed on skin.
- Any white outline left around the edge?
- Is the product cut off anywhere?
- Does the size look right compared to reality? (If not, the registered dimensions are off)
If something’s wrong, go back to Step 1 and reshoot. That’s usually faster than fighting Step 2.
Some products won’t cut automatically
After several hundred SKUs, one thing is clear: a certain share can’t be handled automatically. In our case, mirror-polished pieces with strong reflections blended into the background no matter which model we tried. Those get cut out by hand, or reshot under lighting that tames the reflection.
Rather than forcing a bad automatic result, it’s a legitimate choice to exclude a product from try-on. Showing only the products that cut cleanly gives a better overall impression than showing everything.
Don’t forget the real-world size
A transparent PNG carries no information about how big the product is. The try-on system scales the image against the ear using the product’s real dimensions (for example, 15 mm tall), so you register those together with the image. If they’re off, a tiny stud can render larger than the earlobe.
For products with size variants (10 mm / 12 mm / 14 mm inner diameter, for instance), register the dimensions per size and the rendered size on the ear follows the shopper’s selection.
Where you register this depends on how you installed try-on — see the setup guide for your platform.
Summary
- The transparent PNG is your job. It’s the most work and the most important step
- Shooting decides 80%: white background, straight on, fill the frame, hide the post
- Always zoom in on the automatic result. Reshoot or exclude what won’t cut
- Register real dimensions alongside the image
Once the images are ready, installing the try-on button takes minutes. Start with one product, look at it on an ear, then expand from there.