How to Add AI Virtual Try-On for Earrings and Jewelry to Your Online Store
The two questions jewelry shoppers ask most are “how does it look on me?” and “how big is it?”. Photos and a size table cannot fully answer either, which is why both stay at the top of the return-reason list.
AI virtual try-on answers them on the product page itself. This page is the single overview: what try-on is, how much you can verify for free, and how to install it on your particular platform. The screens are real ones from running try-on across several hundred SKUs in our own store (Adelina Style).
What AI virtual try-on is
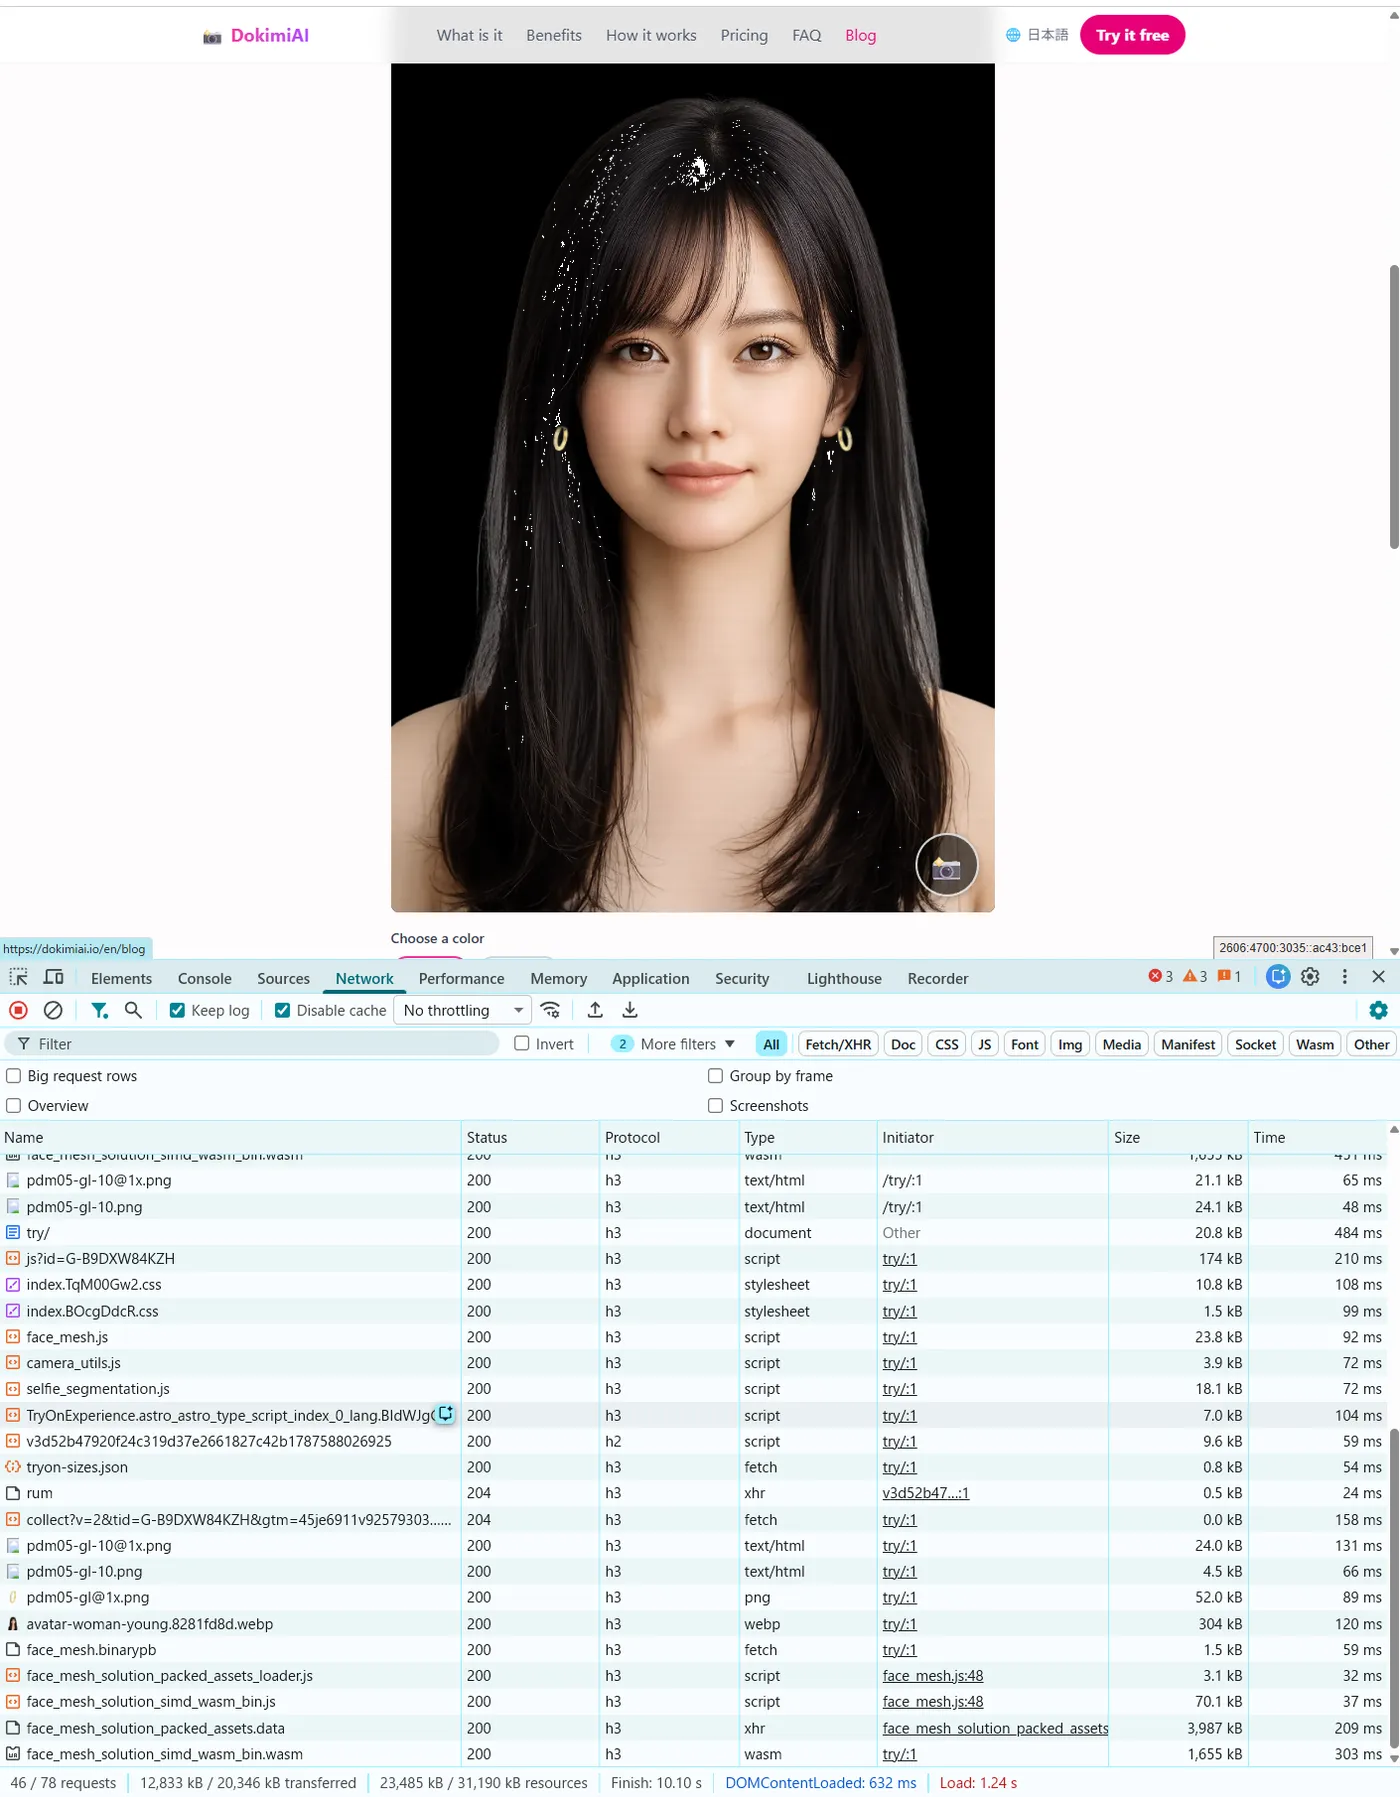
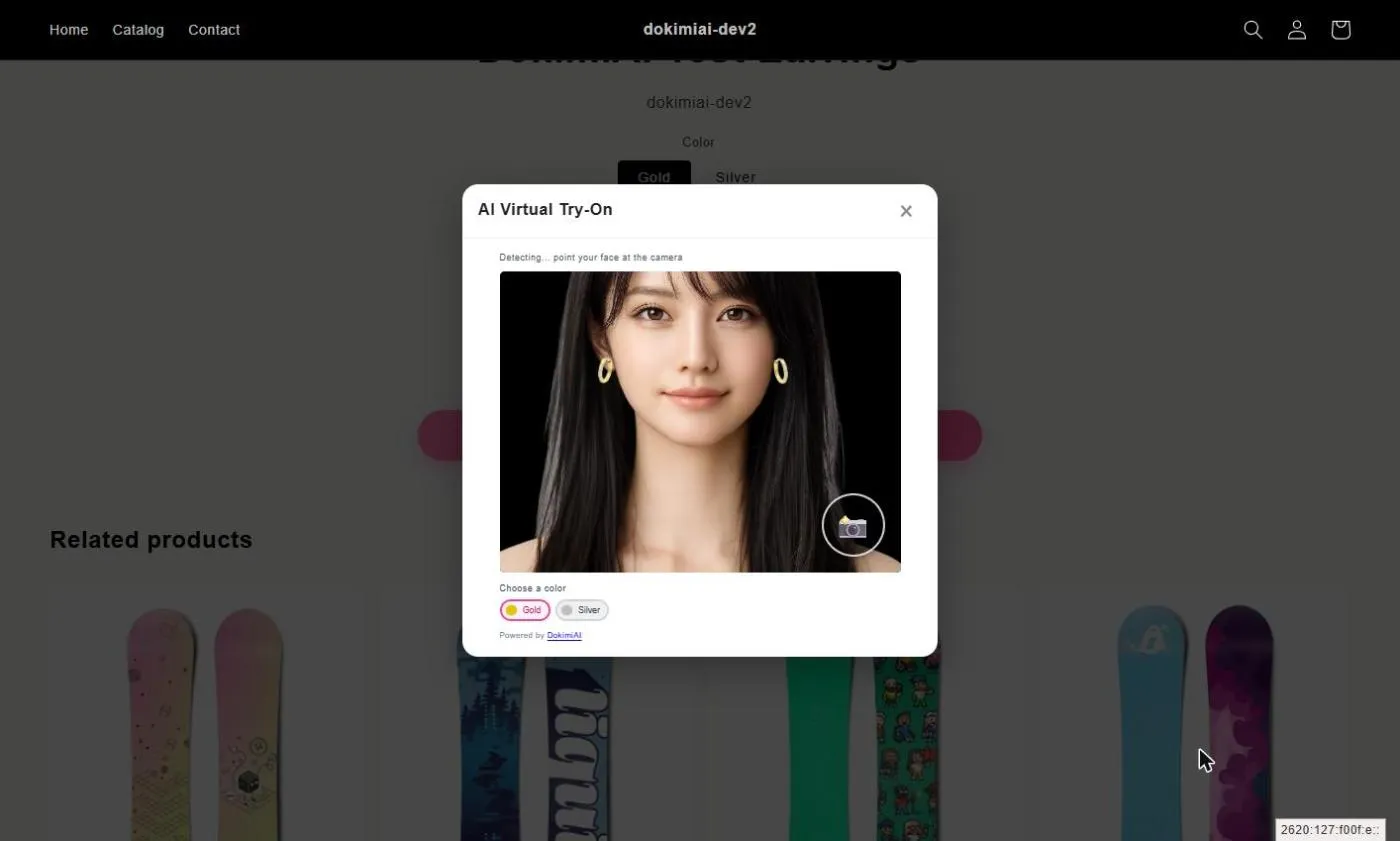
AI virtual try-on detects the position of the shopper’s ear or face from their camera feed and draws your product image onto it, live. Three things define how DokimiAI does it.
It runs entirely inside the browser. Detection and rendering happen on the shopper’s own device; the camera feed is never sent to a server. There is no app to install — tapping the button on the product page opens the camera right there.
What appears is the real product. No generative model inventing a plausible image: the transparent PNG you registered is composited as-is. Colour, shape and finish match your product photography.
Scale comes from real-world size in millimetres. Every frame, the rendered pixel size is computed from the detected ear size and the product height (mm) you registered. Move closer or further away and the proportion to the ear stays the same.
The sizing mechanism is covered in “Why Real-World Size Matters in Earring Try-On”. Why the camera feed never leaves the device is verified against real network traffic in “Virtual Try-On and Privacy”.
Trying it for free
You can check each step before committing, at no cost.
1. Test with your own product image. Upload one transparent PNG at dokimiai.io/en/try/ and the camera try-on runs immediately — no account needed. A few minutes here tells you whether your existing product images are good enough.
2. Put it on your store on the Free plan. Once you have an account, earring try-on ships on your product pages on Free. There is no cap on products or on try-on sessions. Running try-on across your entire catalogue costs $0/month.
3. Decide on paid after you have seen the effect. Paid plans add hats, background replacement and avatar try-on, and remove the “Powered by DokimiAI” line. Whether try-on moves your sales is something you can determine while still on Free — if it does not, paying will not change that.
The full money-vs-time breakdown is in “What Virtual Try-On Actually Costs a Small Jewelry Store”. The short version: the cost is time rather than money, and most of the time goes into images.
Installing on Shopify, WooCommerce, PrestaShop and everything else
The platform changes, but the job is always the same three steps: (1) get try-on onto the site, (2) register a transparent PNG and a real size per product, (3) check it on the product page. Only step 1 differs.
Shopify
Install DokimiAI from the Shopify App Store, register images and sizes per product under Try-On Images inside the app, then drop the App Block onto your product template in the theme editor.
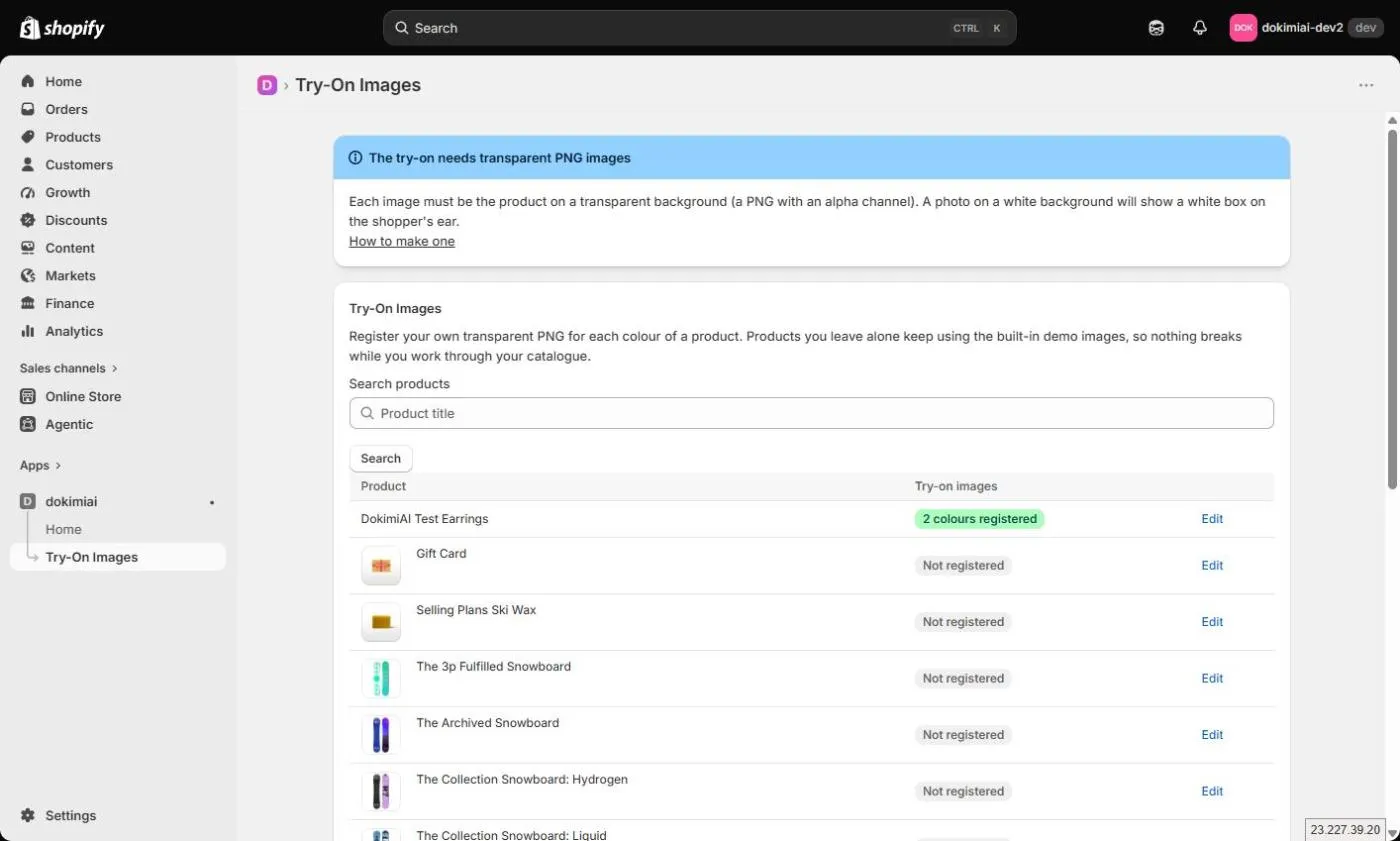
Use URLs from Content > Files in the Shopify admin for your images. Try-on draws images onto a browser canvas, so the host serving them has to allow cross-origin reads (CORS). Shopify Files does; many external hosts do not, which produces images that open fine in a browser but fail in try-on.
Full walkthrough: “How to Add Virtual Try-On to a Shopify Store” and “Setting Up Try-On Products in Shopify”.
WooCommerce / WordPress
This is the easiest one. Search for DokimiAI under Plugins > Add New in wp-admin, install and activate — a try-on box appears in the product editor. No API key, no server configuration.
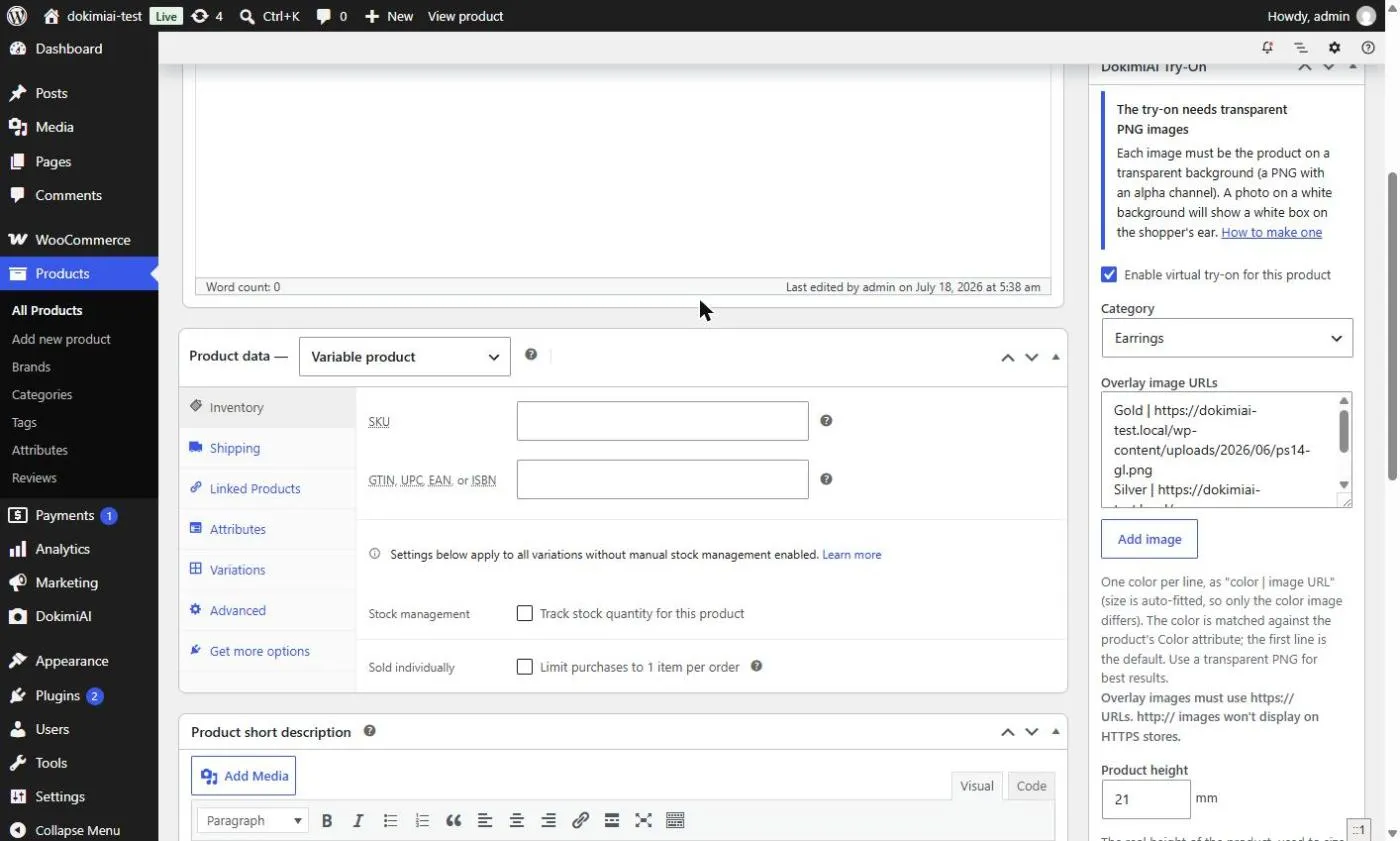
The media library is fine as an image host — it is same-origin, so none of the cross-origin problems apply. Activating the plugin changes nothing on its own: the button only appears on products you explicitly enable, so it is safe to install on a live site.
More: “How to Add Virtual Try-On to WooCommerce” and “Setting Up Try-On Products in WooCommerce”.
PrestaShop
PrestaShop uses a dedicated module distributed as a ZIP. Upload it under Modules > Upload a module in the Back Office, enter your API key, press Verify, then switch try-on on per product. PrestaShop 8 and 9 are supported.
Download and step-by-step setup: the PrestaShop page.
Any other store (Squarespace, Wix, BigCommerce, Magento, custom builds)
Without a dedicated app or plugin, try-on still works as long as you can add one line to your site’s HTML.
- Sign up at console.dokimiai.io with an email address (no password, free)
- Register your store’s domain — requests from any other domain are refused
- Register products by SKU, colour and image URL
- Paste the install snippet — the script tag once for the whole site (footer is the usual place) and one button per product page
Your images stay on your own server or CDN; you register only the URL. DokimiAI never stores your images. SKUs and colour names accept lowercase letters, digits, hyphens and underscores only.
Details: “Virtual Try-On on Any E-Commerce Platform with One Script Tag”.
What you prepare: transparent PNGs and real size (mm)
Whatever the platform, these two are the store’s job — and they largely determine how good the try-on looks.
A transparent PNG per colour
One background-transparent PNG for each colour variant. A PNG with a white background passes validation without an error and puts a white rectangle on the ear, so check transparency before you register.
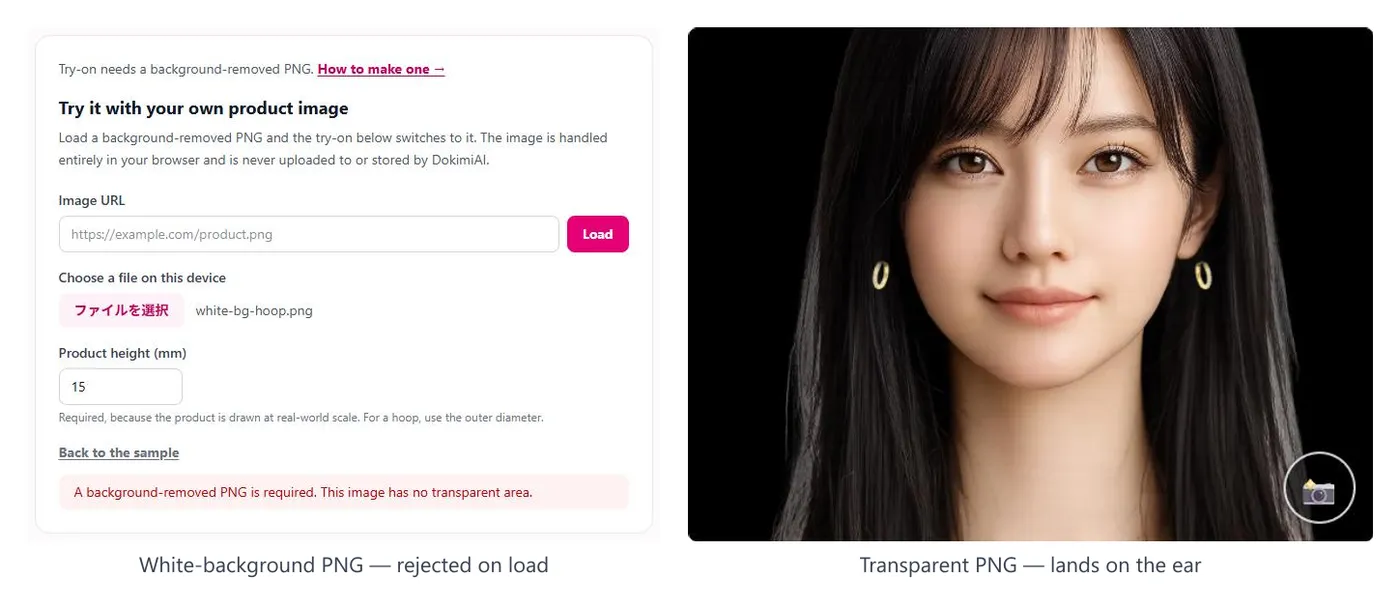
Padding above and below the product is read as part of the height, which makes the product render too small — crop it tight. Shooting conditions and the editing workflow are in “How to Make Transparent PNGs for Virtual Try-On”.
Real size = height in millimetres
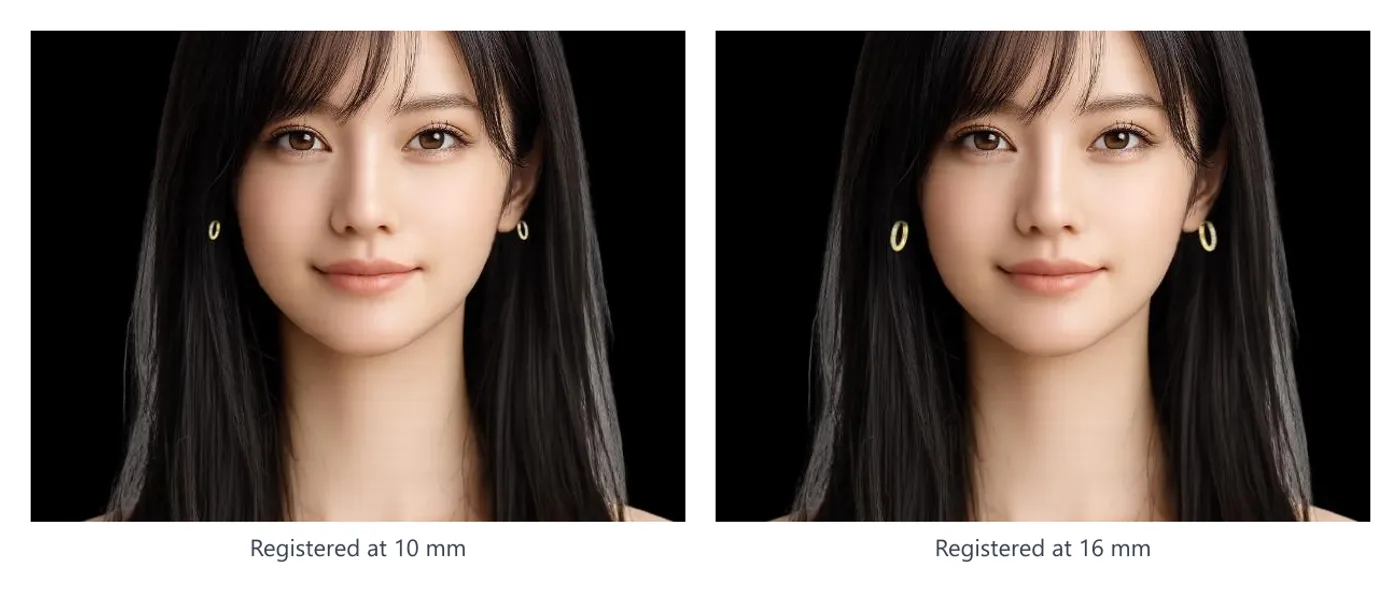
You register one number: the product’s height in mm, measured along the vertical axis as worn. Width follows from the image’s aspect ratio.
| Product | Value to register |
|---|---|
| Stud | Height of the decorative part |
| Hoop | Inner diameter + wire thickness × 2 (12 mm inner, 2 mm wire → 16 mm) |
| Drop / chain | Full length from the ear-lobe attachment to the bottom |
| Ear cuff | Height of the cuff itself |
Leave it blank and it renders at the default 21 mm — too large for a stud, too small for a statement hoop. Register it per product. Products with size variants take a value per size, and the rendered size follows the shopper’s size selection.
Pricing
Plans are split by feature. Product count and try-on sessions are unlimited on every plan.
| Free | Pro | Business | Enterprise | |
|---|---|---|---|---|
| Products & try-on sessions | Unlimited | Unlimited | Unlimited | Unlimited |
| Earring try-on, social sharing, skin smoothing | ✓ | ✓ | ✓ | ✓ |
| Hat layering, background replacement | — | ✓ | ✓ | ✓ |
| Avatar try-on, front/profile switching | — | — | ✓ | ✓ |
| Logo replacement, API integration, priority support | — | — | — | ✓ |
| Monthly | $0 | $85 | $198 | Custom quote |
Annual billing is discounted (Pro $816, Business $1,900). Japanese-market pricing is ¥0 / ¥12,800 / ¥29,800. Current terms are on the pricing section; Enterprise goes through contact.
FAQ
Is the camera feed sent anywhere?
No. Face detection and product rendering both run inside the shopper’s browser; the video never reaches a DokimiAI server. We verified this against real network traffic in “Virtual Try-On and Privacy”.
Do I have to hand over my product images?
No. Shopify Files, the WordPress media library, or your own server or CDN — the images stay with you and you register the URL only.
How many products can I register?
There is no limit. Product count and try-on sessions are unlimited, including on Free.
How long until the first product works?
About 15 minutes if the image is ready. The image preparation is the slow part — budget 5–30 minutes per product for a transparent PNG. Get one product rendering on the ear before you make the rest of the images; it is faster overall.
Can I try on anything other than earrings?
Hat layering requires Pro or above, and avatar try-on requires Business or above. Earring and ear-cuff try-on are included on Free.
The button is there but nothing appears
Three usual causes: the colour name does not match the variant option exactly (“Gold” and “gold” are different), the real size was never registered so it renders at 21 mm, or the PNG is not actually transparent. None of these raise an error, so check them in that order.
Will it affect my existing product pages?
No. The button appears only on products you enable, so you can prove it out on one product before rolling it out. Installing on a live site is safe.