Virtual Try-On on Any E-Commerce Platform with One Script Tag
Shopify and WooCommerce have a dedicated app and plugin. Everything else — Squarespace, Wix, BigCommerce, Magento, a custom-built store — can still run try-on. If you can add one line to your site’s HTML, you’re covered.
The mechanism is simple: register your products on the DokimiAI side, paste an install snippet on your site. No server changes and no image uploads.
How AI virtual try-on works, how much of it is free, and what it costs are covered in one page in the setup guide.
Prerequisite: can you edit the HTML?
You need access to two places:
- A site-wide location (footer, usually) where you can add one script tag
- Inside the product page, where you can place a short piece of HTML that specifies the SKU
Platforms name these differently — “custom code,” “footer injection,” “code injection,” “HTML block” — but if your platform has any of those, you can do step 1. Step 2 depends on whether product descriptions accept HTML; most hosted platforms allow it on paid tiers.
Custom-built sites have no restrictions.
Steps
1. Sign up
Create an account at console.dokimiai.io with your email. There’s no password; you log in through a link sent to your inbox. Signing up is free, and you can install the button and test it without paying.
2. Register your domain
Under Domains, add your store’s domain. Try-on refuses to run on any other domain, so nobody can reuse your setup elsewhere. www and non-www count as the same site.
One account covers one domain. Multiple stores mean multiple accounts.
3. Register products
Under Products, add each product:
| Field | What it is |
|---|---|
| SKU | The identifier. Lowercase letters, digits, hyphens and underscores only. Can’t be changed later |
| Colors | A color name (same character rule — gold, silver) and the URL of that color’s transparent PNG. One row per color, up to 20 |
| Sizes | Size names (8mm / 10mm …), up to 20. Leave empty if the product has no sizes |
Images stay on your own server or CDN; you register URLs only. DokimiAI never stores them.
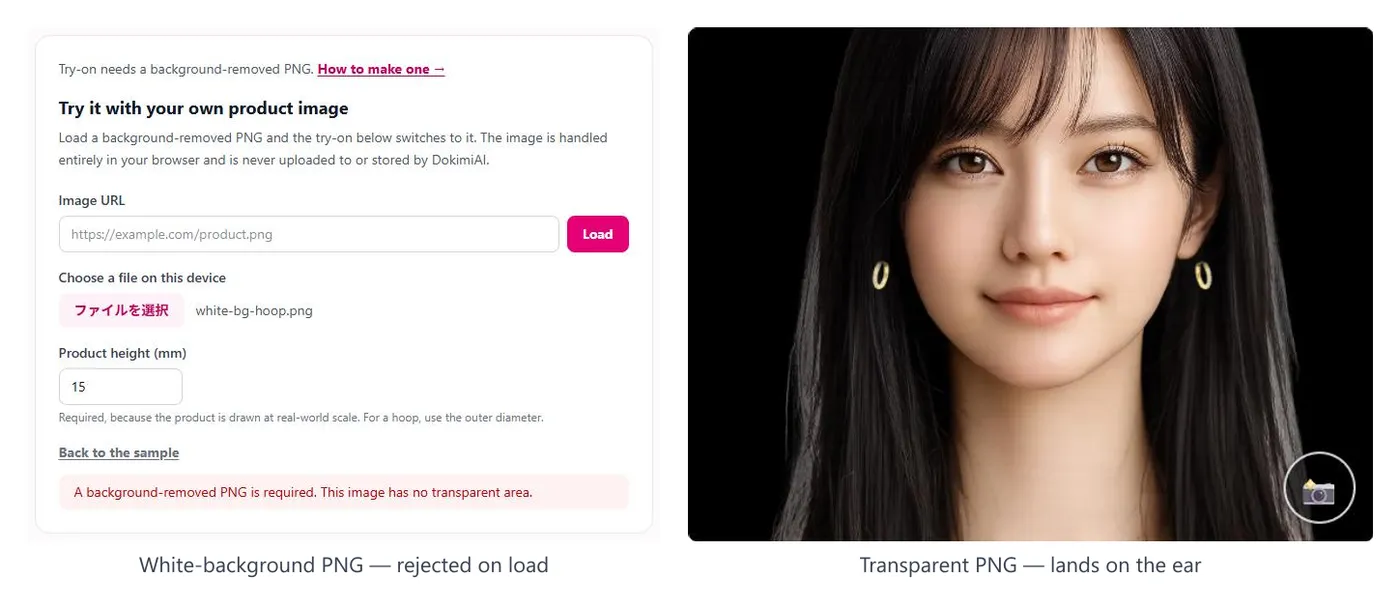
Each URL is checked on save: it must be https, on a public host, and served as PNG. Colors that fail are marked unverified, and a product with no verified color doesn’t appear in try-on. Transparency is not inspected — a white-background PNG passes and produces a white panel on the ear, so check your files against the PNG guide yourself.
Name and price aren’t registered. There’s currently no real-world-size field either; products render at a default scale.
4. Paste the install snippet
After saving a product, its edit page shows the install snippet. It has two parts:
- A script tag with your site key — once per site, in your site-wide HTML (footer recommended)
- A button element carrying
data-dokimiai-sku="<SKU>"— on the page that shows that product, where you want the button
The script tag is identical on every product’s page, so you paste it once. From the second product on, only the button.
Copy it from the console after logging in. The example on the marketing site has no site key.
Testing
Open the product page on your phone and tap the button.
- Camera starts, product lands on the ear → done
- No button → check that both the script tag and the button are in the page source, and that the SKU spelling matches
- Button appears but nothing renders → check in the console that the product is enabled (all colors unverified = disabled), and that the registered domain matches this site (subdomains other than
wwwcount as different sites) - A white panel appears → the PNG isn’t transparent
Only registered products get the button, so test with one before adding more.
Platform notes
- Squarespace / Wix: code injection and HTML blocks depend on plan tier. Check that product descriptions accept HTML
- BigCommerce: script manager for the site-wide tag; product description accepts HTML
- Magento / PrestaShop / other self-hosted: edit the footer template and the product detail template. (PrestaShop also has a dedicated module — see the PrestaShop page)
- Custom sites: no restrictions
Where each platform lets you put HTML changes over time, so confirm against the platform’s current help docs.
Summary
- Sign up → domain → products (SKU, color + image URL, sizes) → script tag once in site-wide HTML → button on the product page
- Images stay on your server; DokimiAI never holds them
- Works anywhere you can add one line of HTML
- Test with one product, then expand
Even without a dedicated app, the work is the same as on Shopify or WooCommerce: register images. The differences are that you do it in the console instead of your store’s admin, and that SKU and color names have a character restriction.