Adding a Virtual Try-On Plugin to WordPress
How you add virtual try-on to a WordPress jewelry site depends on one thing: whether the site runs WooCommerce.
| Your site | Method | First product |
|---|---|---|
| Products are managed in WooCommerce | Install the plugin | ~10 minutes |
| No WooCommerce (static pages, another cart plugin, a landing page) | Paste one line of embed code | ~15 minutes |
In both cases your product images (transparent PNGs) can stay in the WordPress media library. Nothing is uploaded anywhere else, and the try-on itself runs entirely in the shopper’s browser.
If you don’t have transparent PNGs yet, start with How to Make Transparent PNGs for Virtual Try-On.
With WooCommerce: the plugin
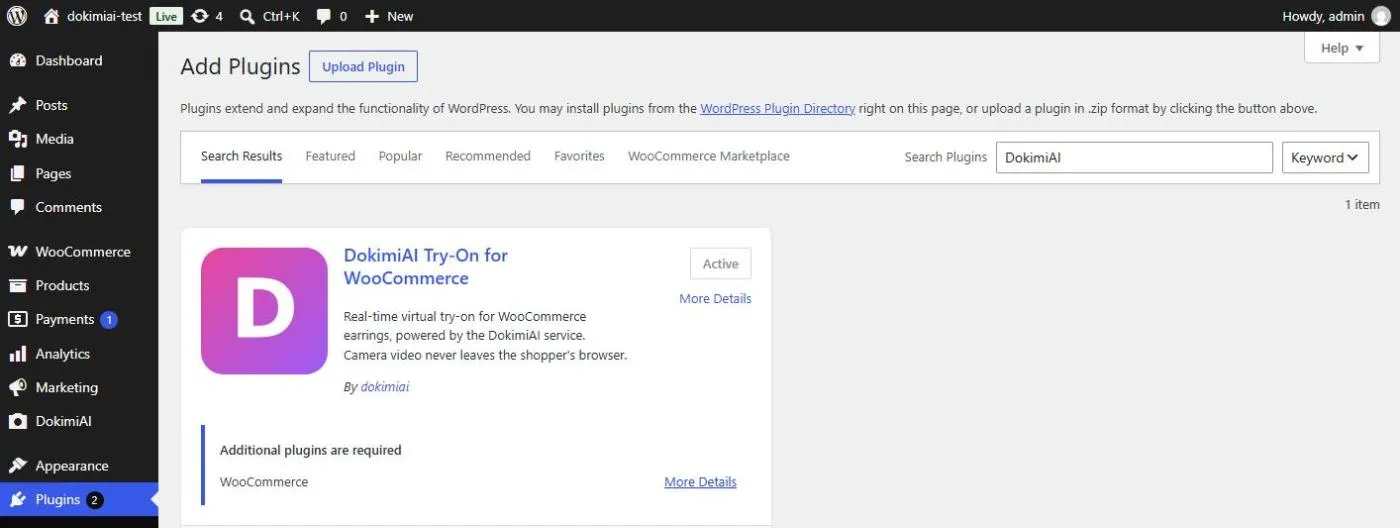
Go to Plugins → Add New, search for DokimiAI, install and activate. Activation alone changes nothing; the button appears only on products where you enable it.
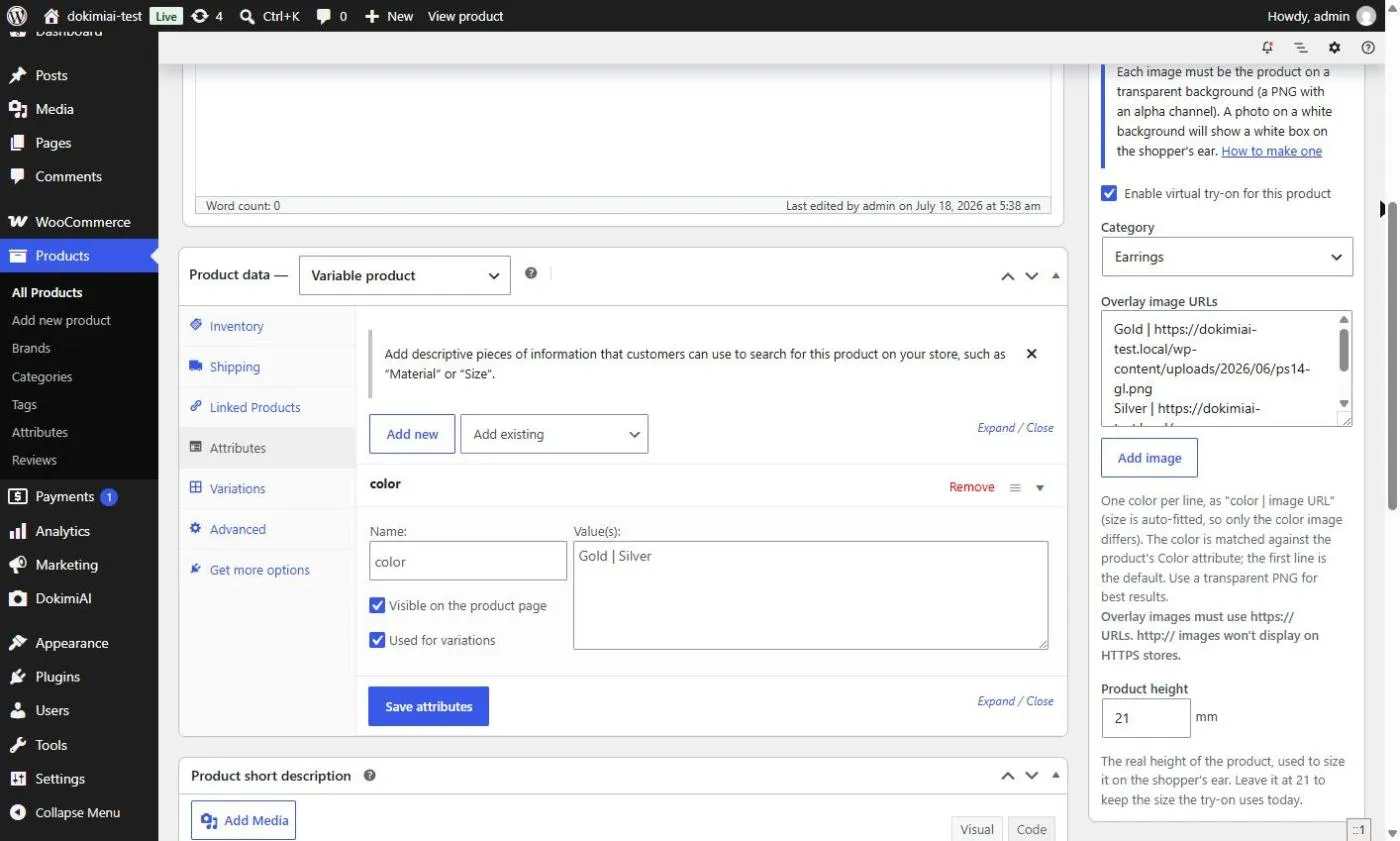
On the product edit screen, a DokimiAI Try-On box is added. Fill in:
- Enable try-on
- Category (hoop / stud / ear cuff)
- An image per color, picked from the media library. The color name must match the variation attribute value exactly
- Real-world size in mm. For hoops: inner diameter + wire thickness × 2
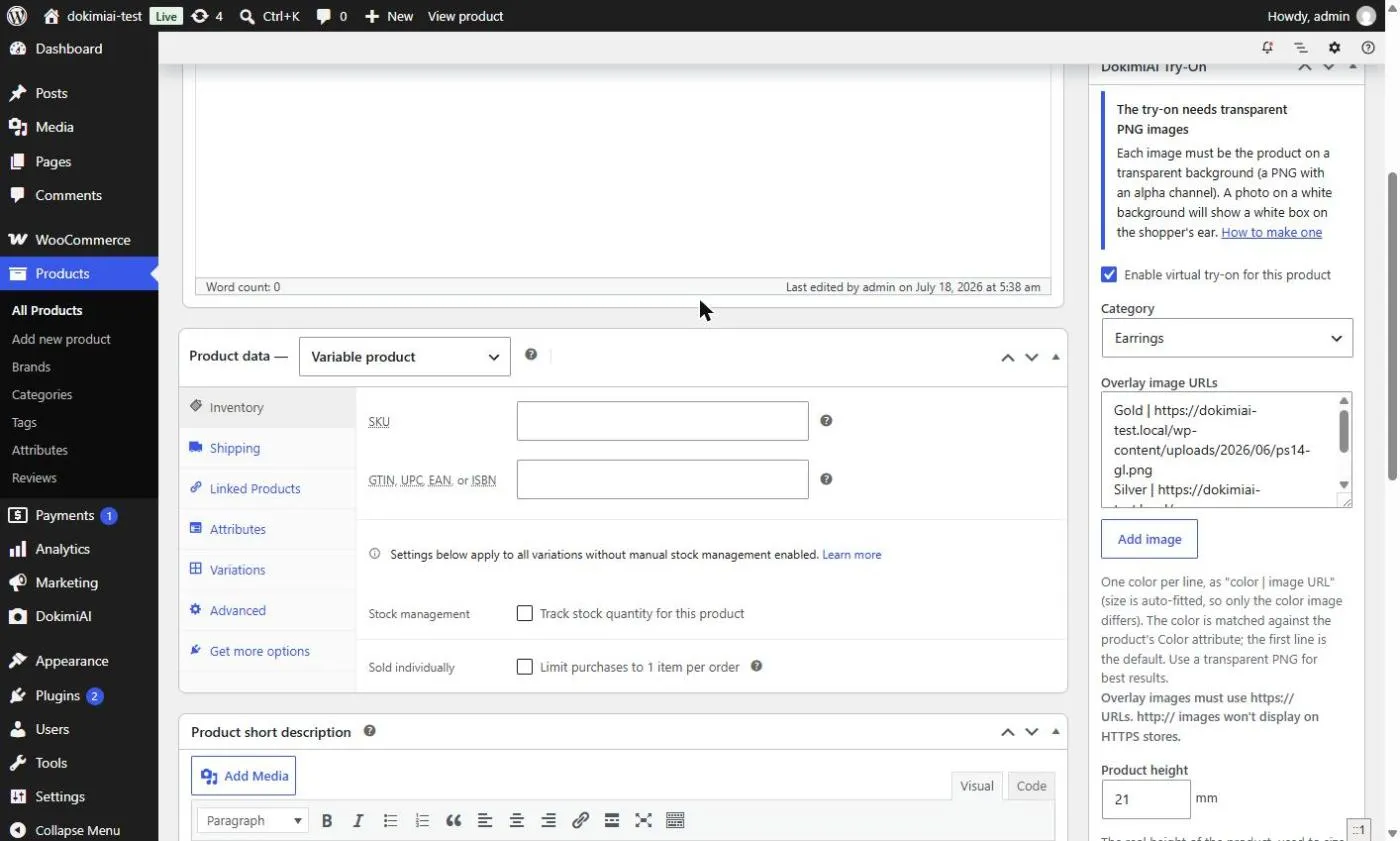
Save, and the try-on button appears next to the add-to-cart button. The full walkthrough, including common problems, is in How to Add Virtual Try-On to WooCommerce.
If you have WooCommerce, this is the easy path. There’s no reason to use the embed method instead.
Without WooCommerce: the embed code
If your products live on static pages, in a different cart plugin, or on a single landing page, the plugin won’t work — it relies on WooCommerce’s product data. Use the embed method instead; it works on any site.
Three steps.
1. Sign up and register your site
Sign up at console.dokimiai.io with your email. There’s no password; you log in through a link sent to your inbox.
After logging in, add your site’s domain under Domains (e.g. example.com). Try-on only runs on registered domains, so this is required. www and non-www count as the same site. One account covers one domain.
2. Register products
Under Products, add each product you want try-on on:
- SKU (the identifier; lowercase letters, digits, hyphens and underscores only; can’t be changed later)
- An image URL per color. Color names follow the same rule — lowercase letters, digits, hyphens, underscores (
gold,silver). Paste the media-library URL as-is - Size names, if the product has sizes; otherwise leave empty
On save, each image URL is checked: it must be https, on a public host, and served as PNG. Colors that fail the check are marked unverified, and a product with no verified color doesn’t appear in try-on. Transparency itself isn’t inspected — preparing a proper transparent PNG is on you.
Product name and price aren’t registered; try-on doesn’t need them.
3. Paste the code
After saving, the product’s edit page shows its install snippet. It has two parts:
- A script tag with your site key — paste once in a site-wide location
- A button element carrying
data-dokimiai-sku="<SKU>"— paste on the page that shows that product
On WordPress, part 1 goes in a footer widget or a “header and footer code” plugin; editing theme files directly gets wiped by the next theme update. Part 2 goes in a Custom HTML block on the page where the product appears.
That page now has a try-on button.
What’s true either way
- Images stay on your site. DokimiAI never stores them
- Camera footage never leaves the browser. Face detection and compositing both happen locally
- Check the rendered size. A transparent PNG carries no size information. The plugin lets you register real-world mm; the embed method currently has no size field and renders at a default scale, so you adjust by how much margin the image has
- Start with one product. Look at it on an ear once before adjusting your photography or size values across the catalog
Summary
- WooCommerce → plugin; register on the product edit screen
- No WooCommerce → embed; register products in the console, paste one line, reference the SKU
- Both: media library hosting is fine, no server changes
If you’re unsure which you are: look for “WooCommerce” in the left menu of your WordPress admin. If it’s there, use the plugin.