How to Add Virtual Try-On to WooCommerce (Plugin)
WooCommerce is the easiest platform to add virtual try-on to. Install the plugin, register an image and a size on the product edit screen, and the try-on button appears on the product page. No external account, no API key.
Three steps:
- Install and activate the plugin
- Register a try-on image (transparent PNG) and real-world size per product
- Check the product page
If your PNGs aren’t ready yet, read How to Make Transparent PNGs for Virtual Try-On first. This article assumes you have them.
1. Install the plugin
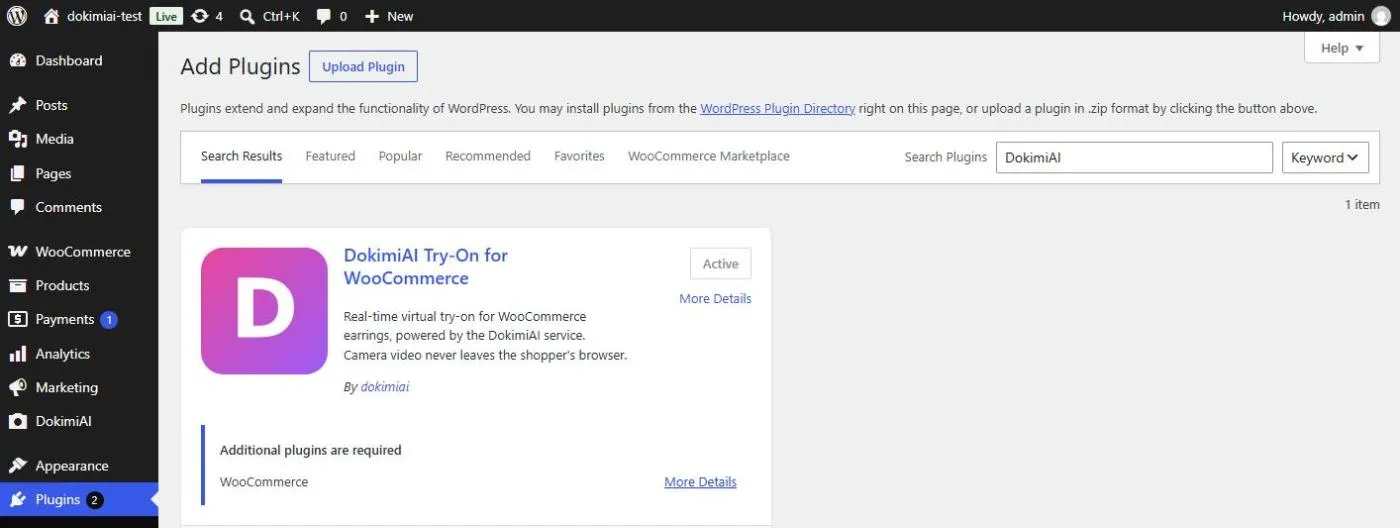
In your WordPress admin, go to Plugins → Add New, search for DokimiAI, install and activate. It comes from the WordPress.org plugin directory, so it’s the reviewed version.
Activating changes nothing on its own. The try-on button only appears on products where you turn it on, so existing product pages are untouched. It’s safe to install on a live site.
There’s a single settings screen with one option: whether to show a “Powered by DokimiAI” line (off by default).
2. Register try-on images per product
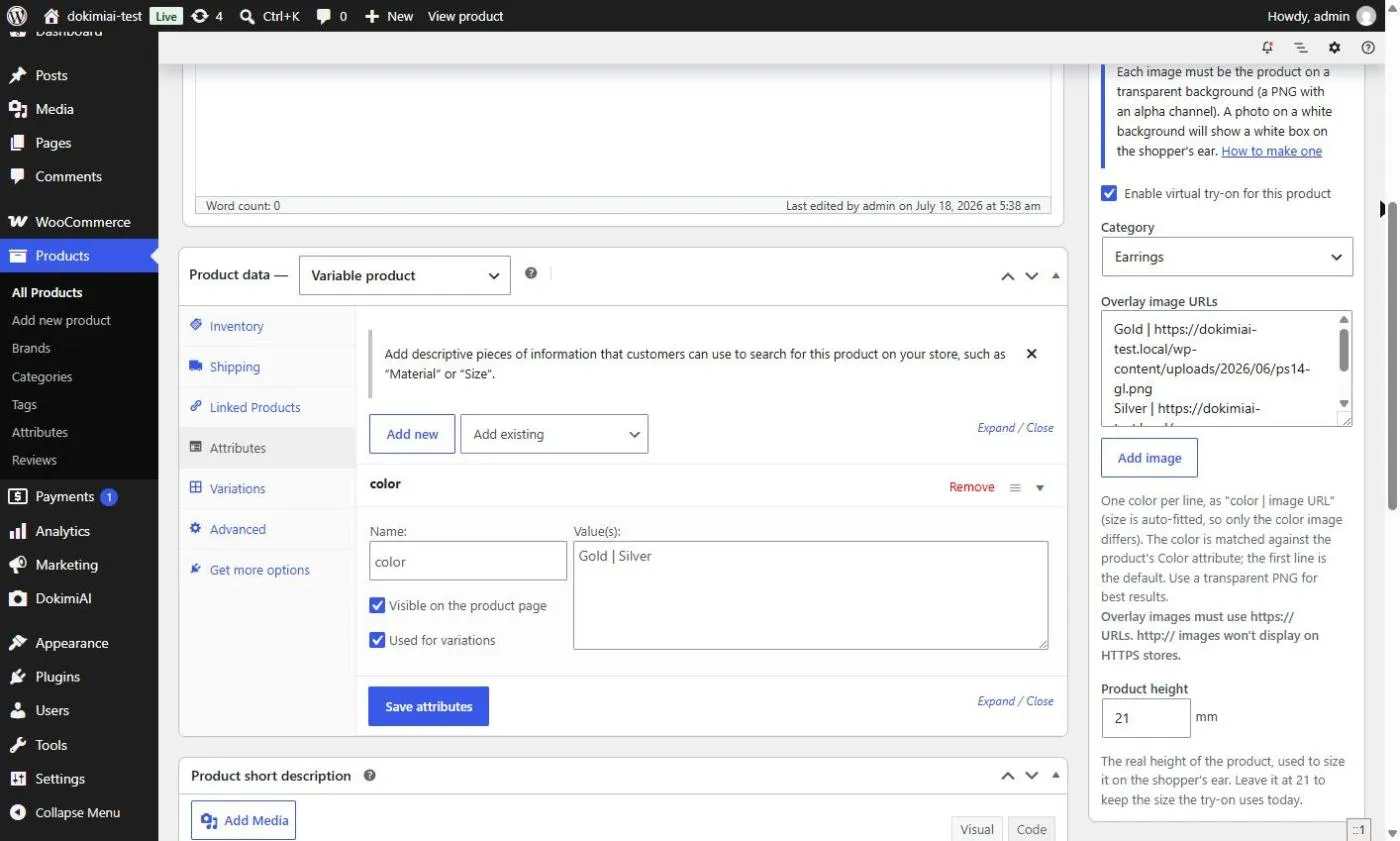
Open Products → Edit on a product. A DokimiAI Try-On box has been added to the edit screen. You set four things there.
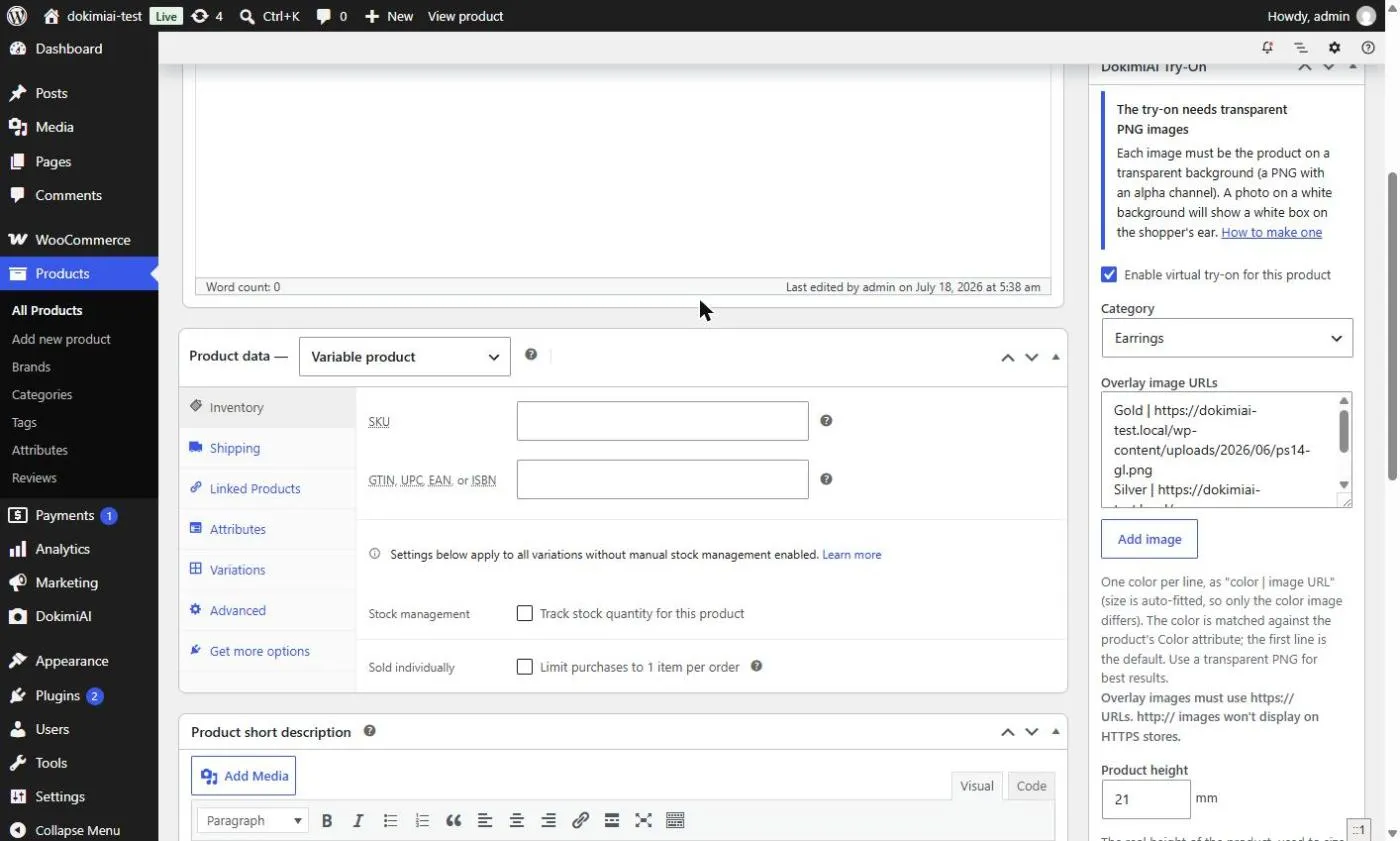
Enable try-on
Only checked products get the button.
Category
Choose hoop earrings, stud earrings, or ear cuff. The category decides where on the ear the product sits: hoops hang from the bottom of the lobe, studs sit on the center of the lobe, ear cuffs sit on the rim.
Image per color
One row per color: a color name and an image. You can pick the image from the media library.
The color name must match the variation attribute value exactly. Register “Gold” while the attribute says “Yellow Gold” and that color won’t render. There’s no error, so this is the first thing to check when the product doesn’t appear.
Simple products (no variations) need just one row.
The media library is fine for hosting. Because the image is on the same site, there’s no cross-origin loading restriction (CORS) to worry about — one of the reasons WooCommerce is the easy case.
Real-world size (mm)
Enter the product’s height in millimeters. Try-on renders at real scale against the ear, so if this is off, a small stud can end up larger than the earlobe.
For hoops: inner diameter + wire thickness × 2. A 12 mm hoop in 2 mm wire is 16 mm.
Blank means the 21 mm default. Registering an image alone doesn’t change the rendered size, so always fill this in.
For variable products with size variations, you can also register a size per variation. This requires each variation to have a unique SKU; products with duplicate SKUs won’t switch size.
Click Update to save.
3. Check the product page
Open the product on your phone. The try-on button should sit near the add-to-cart button.
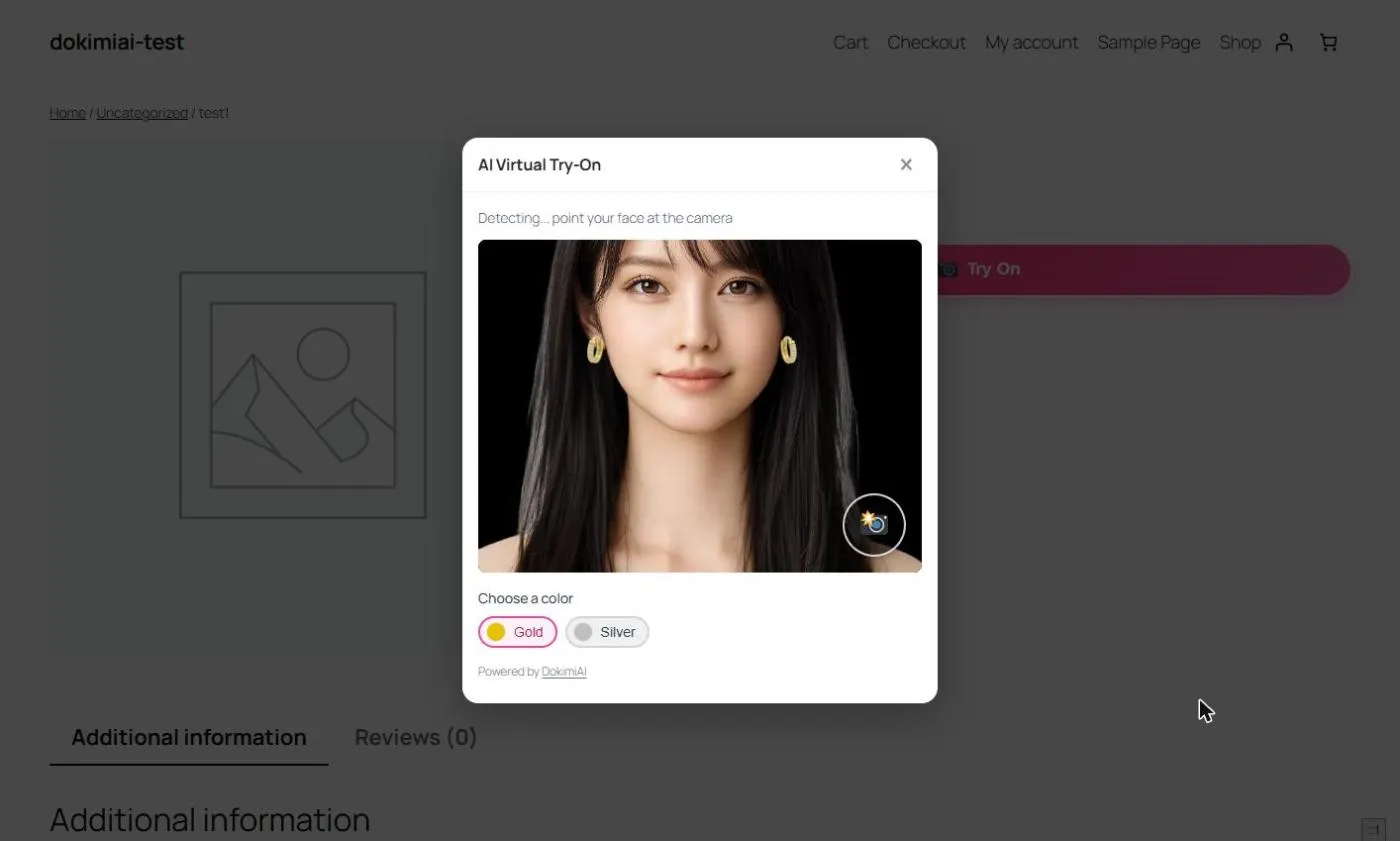
Check three things:
- The camera starts and the product lands on the ear. If not, check the color-name spelling
- The size matches the real product. If not, adjust the mm value
- Switching color updates the image
If a white rectangle appears instead of the product, the PNG has no transparency. Go back to the PNG guide and redo the image.
Theme compatibility
The button is inserted through WooCommerce’s standard product-page hooks (around the add-to-cart button), so standard themes show it as-is. Themes that fully rebuild the product page with a page builder may skip those hooks, in which case the button won’t appear until the theme calls them.
The impact on page speed is kept small. The face-detection library loads only when a shopper taps the button — not on page load — so shoppers who don’t use try-on download nothing extra.
Common problems
| Symptom | Cause | Fix |
|---|---|---|
| No button | Try-on not enabled / theme skips the hook | Check the box / verify the theme’s hook placement |
| Button shows, product doesn’t render | Color name doesn’t match attribute value | Match the spelling exactly |
| A white rectangle appears | PNG isn’t transparent | Redo the image |
| Wrong size | Still at the 21 mm default | Enter the real dimensions |
| Size switch doesn’t change the size | Per-size values blank / duplicate SKUs | Enter mm per size / make SKUs unique |
Summary
- Install → enable, category, color + image, size on the product edit screen → test on a phone
- Media library hosting is fine; no external host needed
- Color names must match attribute values exactly
- Always enter the real size
Once the first product works, the rest is repeating the product-edit step. Add products as their images are ready.